
Hello friends,
Welcome to part 2 of my scaled gradient manicure.
In this post you will find detailed steps on how I achieved the look. Also I have shared my tips for successful scaled gradient ...so lets see >>
How to do scaled gradient?
Simply Nailogical has done a lot of tutorials and indeed they are very helpful. Before I started I studied all of them :) Since it's my first attempt I chose to do simple scaled gradient that is double gradient , you can even do triple or more depending on your nail length. I chose V or chevron shape as it's very easy for beginners. Let's get started :)
First of all pick the colors that would look beautiful together or choose two shades of single color. Here I chose Lilac and Purple Shades. Now apply any one shade. I used darker purple as base. Let it dry completely.

Next to avoid any mess up use scotch tape around the nails. Take a sponge. You can use makeup sponge or dish washing sponge. I used dish washing sponge from scotch brite.

Apply your polishes on sponge. Now here is the trick, instead of applying polishes as straight lines which we normally do apply them as V shape as shown in picture above. You can even start from corner of sponge to make V. It helps as we are more focused to show off the gradient as a scaled pattern so copying the pattern on sponge makes the task much easier.


Next tip is to aim at making gradient to the first half of the nail. So here I focused near the cuticle area only. Apply 2-3 coats of gradient depending upon your polish. Always wait for 10 seconds between each coat. When you are happy with gradient wait for another 15 seconds and apply a top coat. I highly recommend using seche-vite top coat for this manicure as it not only dries quick also helps in blending the colors and smoothens the texture of gradient which can look bumpy due to sponge. If you don't have Seche vite find some other quick dry top coat which claims to give gel finish.
 Now remove the scotch tape around the nails and be very gentle and careful. I suggest cutting with scissors for easy removal and avoiding any contact with your fresh gradient. Now wait for the mani to completely dry. It is very important to wait patiently for your gradient base to dry completely so when you apply stencils for making scales it doesn't ruin the base. Wait for atleast half an hour in case of seche vite and more if you are using any other top coat which is not fast drying. In my case I waited overnight as I liked how my nails looked in lilac-purple gradient (click HERE )and I wanted to enjoy this look for sometime.

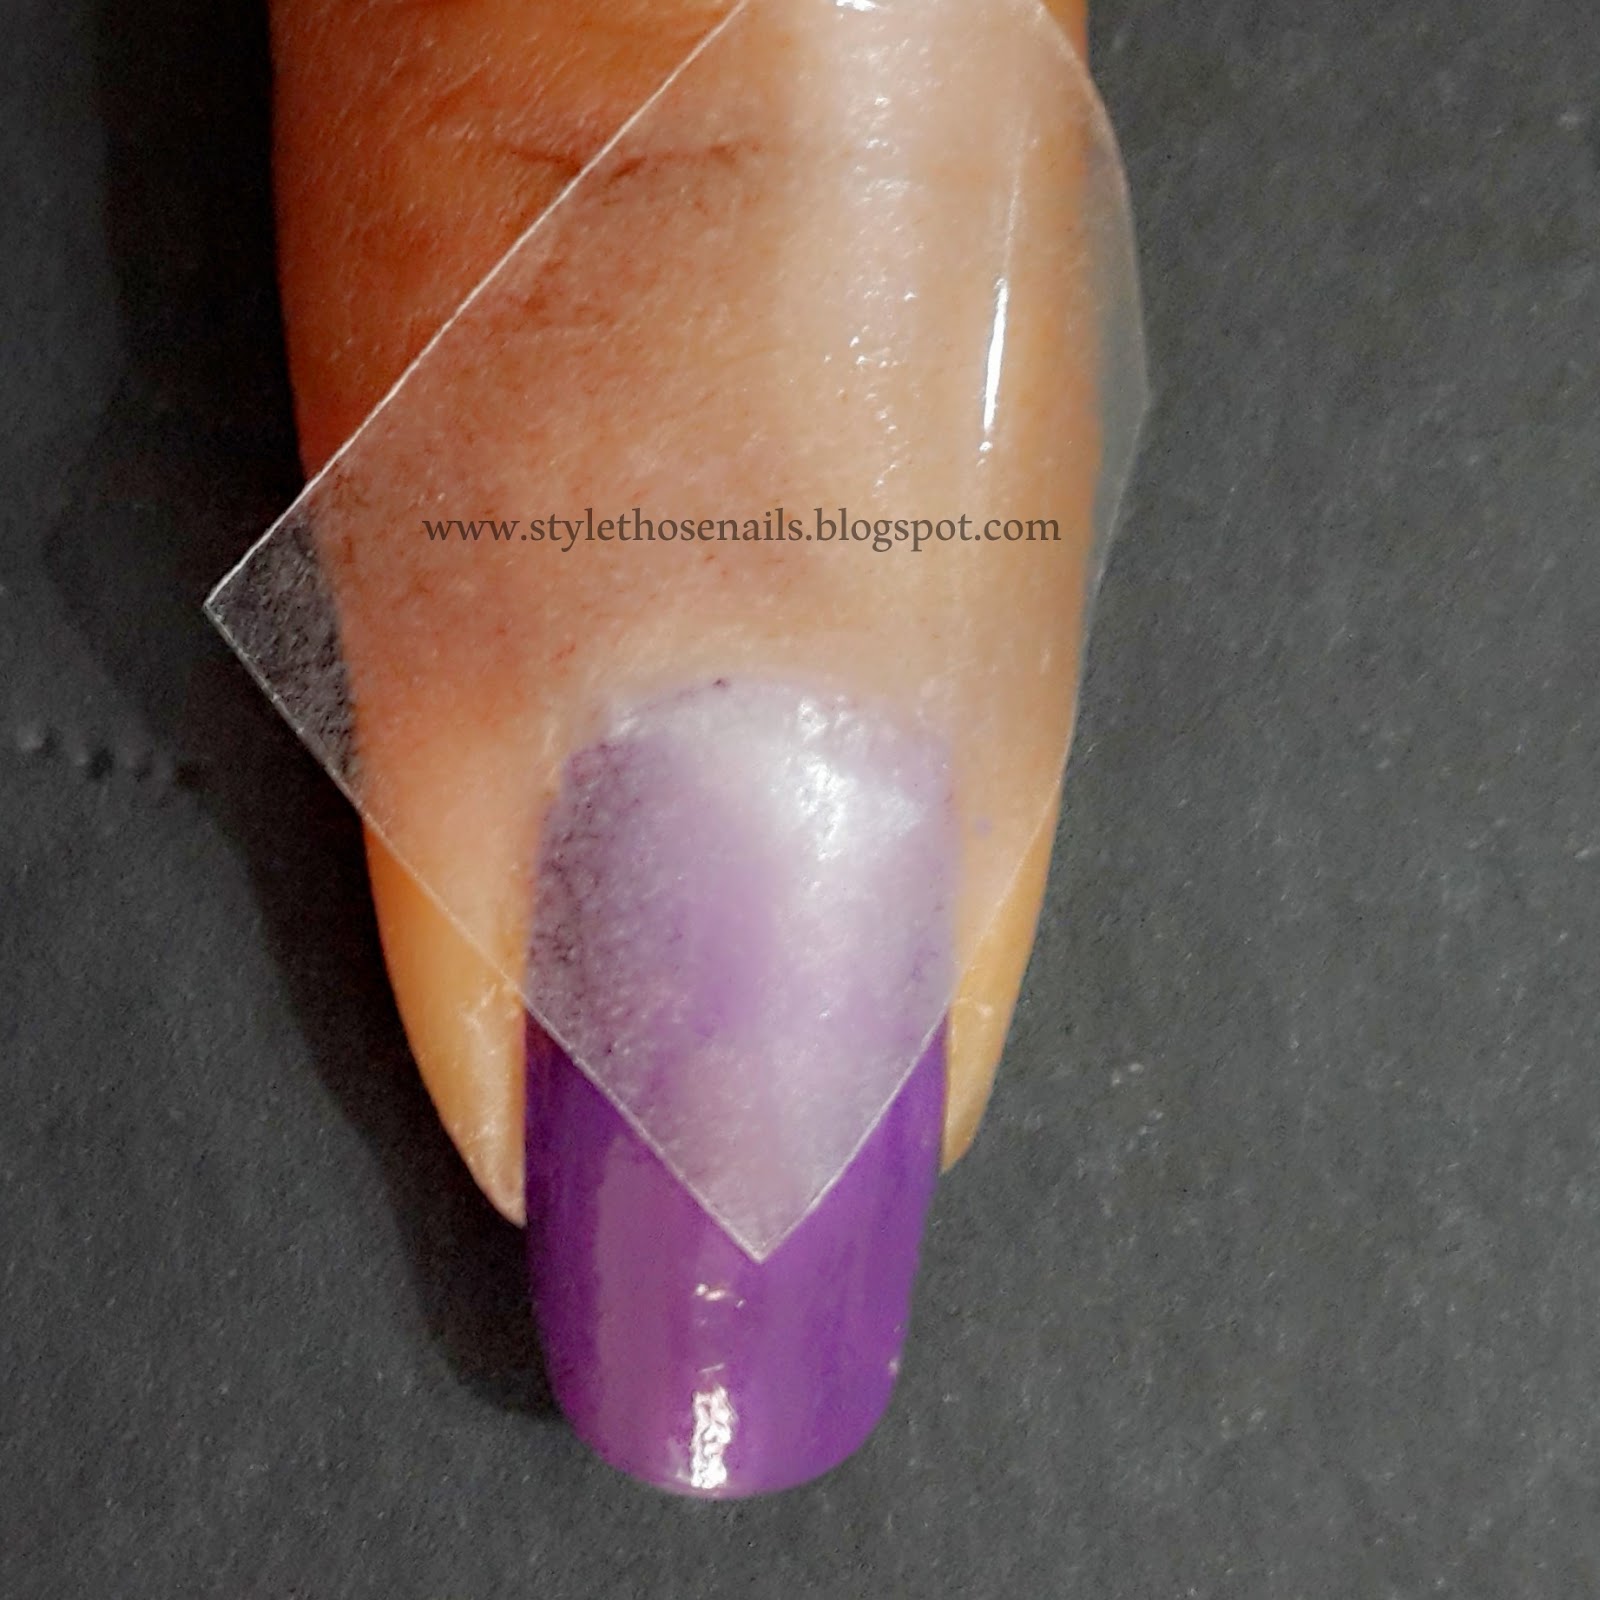
Now place the tape in diamond shape and aim for the center of nail and press firmly. Now secure this stencil tape from the sides by sticking tapes along the sides of nails, this will also prevent skin on the sides of nails from any polish stains.

Again repeat the gradient steps by applying polish on sponge in V shape. You have to repeat the polishes in same order as before for scaled effect. In my case lighter shade in center and darker outside.


After doing 2-3 coats of gradient wait for 5 seconds and very very gently remove tapes, use scissors if required to cut side tapes. Apply top coat twice and tadaaaaaaaaaaa your lovely scaled gradient mani is complete. Wait for mani to dry completely and then dance :D (JK but I literally danced when I saw the end result)


Note: If you see uneven lines as seen in pics above correct them using the polish and thin brush. Dilute the polish before correcting otherwise it will appear as solid line then top coat it again.

Don't forget to leave your valuable feedback. Also share this post in your circle Thanks :D.
See you with my next nailart..... Till then Take Care :) Check out part 1 HERE

Welcome to part 2 of my scaled gradient manicure.
In this post you will find detailed steps on how I achieved the look. Also I have shared my tips for successful scaled gradient ...so lets see >>
How to do scaled gradient?
Simply Nailogical has done a lot of tutorials and indeed they are very helpful. Before I started I studied all of them :) Since it's my first attempt I chose to do simple scaled gradient that is double gradient , you can even do triple or more depending on your nail length. I chose V or chevron shape as it's very easy for beginners. Let's get started :)
First of all pick the colors that would look beautiful together or choose two shades of single color. Here I chose Lilac and Purple Shades. Now apply any one shade. I used darker purple as base. Let it dry completely.
Next to avoid any mess up use scotch tape around the nails. Take a sponge. You can use makeup sponge or dish washing sponge. I used dish washing sponge from scotch brite.
Apply your polishes on sponge. Now here is the trick, instead of applying polishes as straight lines which we normally do apply them as V shape as shown in picture above. You can even start from corner of sponge to make V. It helps as we are more focused to show off the gradient as a scaled pattern so copying the pattern on sponge makes the task much easier.
Next tip is to aim at making gradient to the first half of the nail. So here I focused near the cuticle area only. Apply 2-3 coats of gradient depending upon your polish. Always wait for 10 seconds between each coat. When you are happy with gradient wait for another 15 seconds and apply a top coat. I highly recommend using seche-vite top coat for this manicure as it not only dries quick also helps in blending the colors and smoothens the texture of gradient which can look bumpy due to sponge. If you don't have Seche vite find some other quick dry top coat which claims to give gel finish.
Now remove the scotch tape around the nails and be very gentle and careful. I suggest cutting with scissors for easy removal and avoiding any contact with your fresh gradient. Now wait for the mani to completely dry. It is very important to wait patiently for your gradient base to dry completely so when you apply stencils for making scales it doesn't ruin the base. Wait for atleast half an hour in case of seche vite and more if you are using any other top coat which is not fast drying. In my case I waited overnight as I liked how my nails looked in lilac-purple gradient (click HERE )and I wanted to enjoy this look for sometime.
Now going to next step. Make the stencil for creating scales by cutting a square piece of tape. You can use ready made nail vinyls or use tape. I used regular scotch tape, To remove the extra stickiness of tape first stick it on the back of your hands (hopefully you don't want to wax other area :P) and peel it off, repeat it 3-4 times. This is very important step as very sticky tape will take away the polish along with it or might leave glue stains on nails.
Now place the tape in diamond shape and aim for the center of nail and press firmly. Now secure this stencil tape from the sides by sticking tapes along the sides of nails, this will also prevent skin on the sides of nails from any polish stains.
Again repeat the gradient steps by applying polish on sponge in V shape. You have to repeat the polishes in same order as before for scaled effect. In my case lighter shade in center and darker outside.
After doing 2-3 coats of gradient wait for 5 seconds and very very gently remove tapes, use scissors if required to cut side tapes. Apply top coat twice and tadaaaaaaaaaaa your lovely scaled gradient mani is complete. Wait for mani to dry completely and then dance :D (JK but I literally danced when I saw the end result)
Note: If you see uneven lines as seen in pics above correct them using the polish and thin brush. Dilute the polish before correcting otherwise it will appear as solid line then top coat it again.
So I sum up by saying that this is a beautiful technique which requires a lot of patience but the end result is worth it. I will be trying out more in future for sure. All the steps above are related to how I acheived my own look, you can of course alter them according to your preference. I really hope it helps my friends who want to try this technique and my fellow stnchallengers who were finding this technique very challenging (including me !!) .
Don't forget to leave your valuable feedback. Also share this post in your circle Thanks :D.
See you with my next nailart..... Till then Take Care :) Check out part 1 HERE
Thanks a Lot
XO
Anita
Don't forget to Share what you Like :)

No comments:
Post a Comment
Love to hear from you, please leave a comment !